Digitising Old Slides (part 2)
24th May 2021
This month I am going to be looking at the scanned slides in Adobe Lightroom. But firstly, following on from last month, the slides need some initial cleaning before I scan them. The example I showed last month has so much dirt or mould on it that it would take an age to edit it in Photoshop and I wouldn't know where to start in Lightroom.
I wasn't sure what to use to clean the slides because I didn't want to damage them any more than was humanly possible. I did wonder if it was worth opening up the slide holder and removing the slides to clean them but realised this would take forever and increase the risk of damage so scrapped that idea. Wiping with a cloth was out and just a rocket blower blast wouldn't shift anything and a chemical cleaner seemed drastic. Then I hit upon the idea of tap water along with a Q-tip. It works! Or at least it gets rid of the worst of whatever is on the surface. You can get the slide quite wet really then blow it, wave it about in the air and finally leave it on top of the light box to allow its warmth to dry it off nicely. You soon learn that most of the crud has been washed to the edge of the slide so it is worth concentrating a little more effort there to shift as much as possible.
This process, when scanned, gives a slide that looks like this:
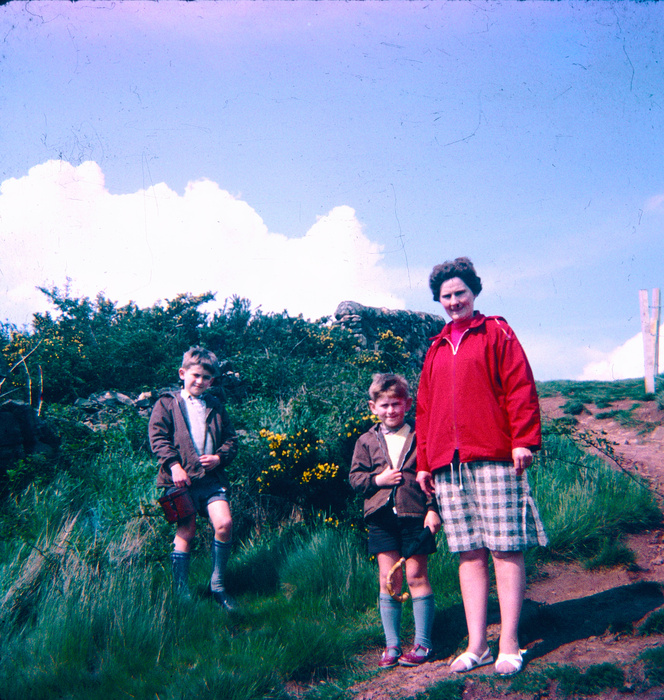
But there's still work to do. As can be seen, there is still some dirt and small hairs etc on the slide and that is when I started to edit what is now a file in Lightroom.
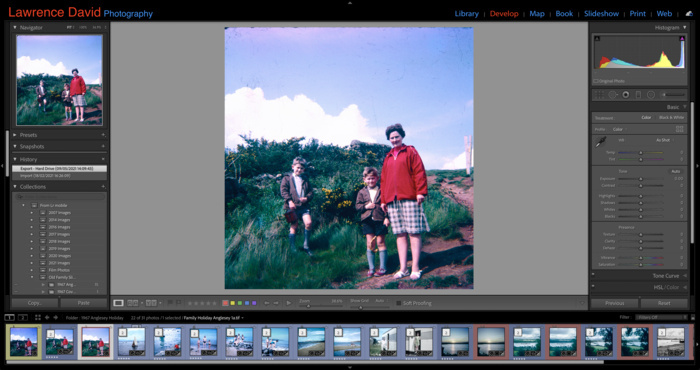
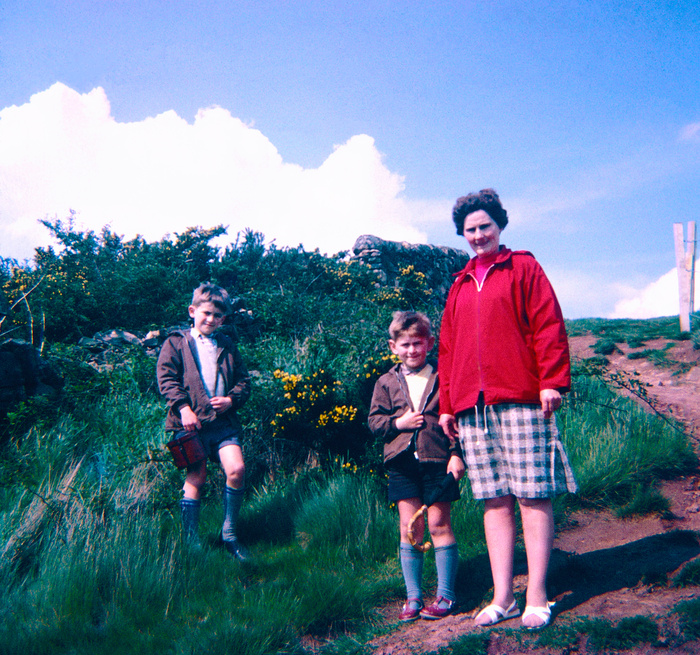
Now that the image can be blown up quite large on my iMac I start to assess whether it's worth continuing or not. I have found that some of the slides are just not worth bothering with because, once 'washed' it can be seen that the emulsion side of the slide has been properly eaten away by the mould and any hope of restoring the colours is way beyond my skill and patience. As can be seen quite clearly, the sky at the top of the frame has lost so much emulsion it has become a magenta blob and any definition that was in the clouds has simply washed away. I decided to crop the top of the sky and after some more work in photoshop I got the image to look like this:
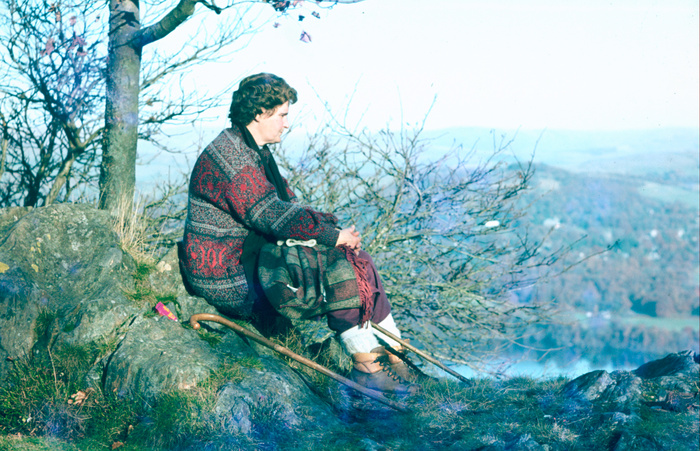
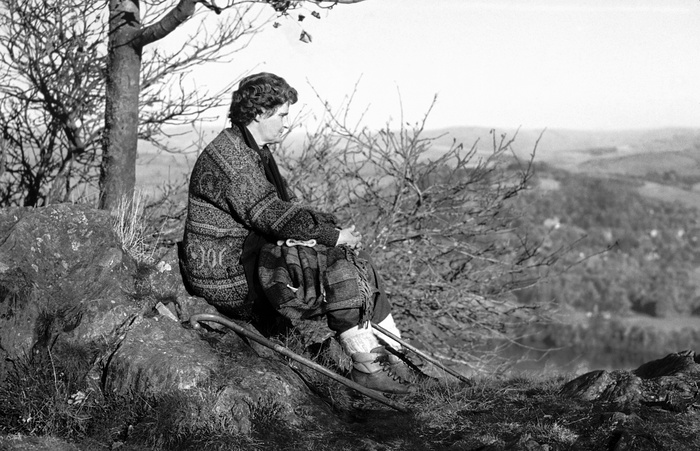
Sometimes converting the image to black and white makes this easier though. That tends to show the damage as one of contrast which can be repaired to a great extent using the radial tool.
This image of my Mum, somewhere in the Lake District, shows very well the colour damage and then , once converted to black and white, how I managed to restore it, reasonably well I think!
and then in black and white after some editing in photoshop:
Because I don't want these blog posts to become a long read I am going to leave off here and continue next month where I shall try to show more of the editing process, particularly in Photoshop. Thanks for reading this month's blog, see you next time!
I wasn't sure what to use to clean the slides because I didn't want to damage them any more than was humanly possible. I did wonder if it was worth opening up the slide holder and removing the slides to clean them but realised this would take forever and increase the risk of damage so scrapped that idea. Wiping with a cloth was out and just a rocket blower blast wouldn't shift anything and a chemical cleaner seemed drastic. Then I hit upon the idea of tap water along with a Q-tip. It works! Or at least it gets rid of the worst of whatever is on the surface. You can get the slide quite wet really then blow it, wave it about in the air and finally leave it on top of the light box to allow its warmth to dry it off nicely. You soon learn that most of the crud has been washed to the edge of the slide so it is worth concentrating a little more effort there to shift as much as possible.
This process, when scanned, gives a slide that looks like this:
But there's still work to do. As can be seen, there is still some dirt and small hairs etc on the slide and that is when I started to edit what is now a file in Lightroom.
Now that the image can be blown up quite large on my iMac I start to assess whether it's worth continuing or not. I have found that some of the slides are just not worth bothering with because, once 'washed' it can be seen that the emulsion side of the slide has been properly eaten away by the mould and any hope of restoring the colours is way beyond my skill and patience. As can be seen quite clearly, the sky at the top of the frame has lost so much emulsion it has become a magenta blob and any definition that was in the clouds has simply washed away. I decided to crop the top of the sky and after some more work in photoshop I got the image to look like this:
Sometimes converting the image to black and white makes this easier though. That tends to show the damage as one of contrast which can be repaired to a great extent using the radial tool.
This image of my Mum, somewhere in the Lake District, shows very well the colour damage and then , once converted to black and white, how I managed to restore it, reasonably well I think!
and then in black and white after some editing in photoshop:
Because I don't want these blog posts to become a long read I am going to leave off here and continue next month where I shall try to show more of the editing process, particularly in Photoshop. Thanks for reading this month's blog, see you next time!
Comments
 By Keith Walker: Nice write up of an exercise many of us have been through. I ended up like you selecting 'the best' and working on this. We have been spoiled by the quality of 'digital' ! By Charles JS: Thanks for the posting I enjoyed and learnt from your write up, digitizing slides can be as exasperating as it can be rewarding. Now that I have some more time on my hands I am also going through my slides. By David Gibbins: Thanks you to Keith and Charles for your kind comments!